Wildlife-friendly landscape lighting in Seattle starts with a simple idea: light what people need to use, and leave the rest of the garden as dark as possible. A path should be easy to follow. A step should be visible in rain. A front entry should feel welcoming. But planting beds, tree canopy, and quiet habitat areas do not need to be washed in bright light all evening.
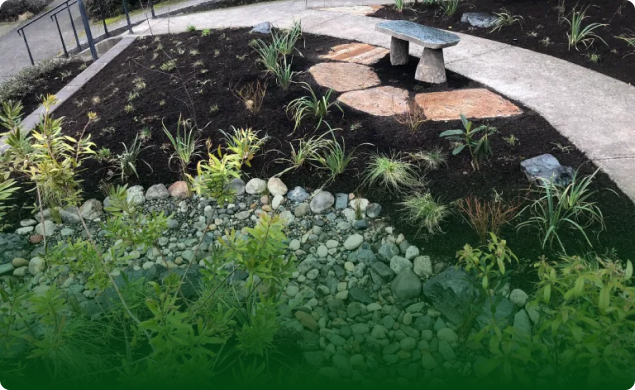
That restraint matters in Seattle yards where gardens often double as habitat. A layered front bed may support bees during the day, birds at the shrub layer, and insects that move through leaf litter after dark. A backyard with native planting, edible shrubs, or a small rain garden can be useful for people and wildlife at the same time. Lighting should help homeowners move safely without flattening the whole yard into a stage.
The broader landscape lighting Seattle guide covers safety, curb appeal, fixtures, and controls. This article narrows in on a more ecological question: how do you light paths, steps, and planting beds without glare, spill, and all-night brightness overpowering the garden? For installation planning, our landscape lighting service can help coordinate lighting with planting, irrigation, and hardscape.
Start With Darkness as Part of the Design
Many lighting plans begin by asking where fixtures can be added. A more wildlife-friendly approach begins by asking which areas should stay dark.
In a typical Seattle yard, that might include:
- dense shrub and tree edges used by birds
- pollinator planting beds away from main circulation
- rain garden edges and damp planting pockets
- side-yard habitat strips that do not need evening use
- bedroom-window sight lines for neighbors and household comfort
Darkness is not neglect. It is part of how the garden functions after sunset. When every bed, trunk, wall, and fence is lit equally, the yard loses depth and wildlife loses quiet cover. It also becomes harder for people to see because bright hotspots make the surrounding areas feel darker by contrast.
The goal is not a blacked-out property. The goal is a clear nighttime hierarchy: safe routes and thresholds receive light; habitat zones receive protection; accent lighting is used sparingly.
Light Paths Low, Evenly, and Away From Eyes
Path lights are often the first fixtures homeowners imagine, but they are also easy to overdo. Too many tall, bright fixtures can create glare at eye level and make a garden feel commercial instead of calm.
For walkways, low and shielded usually works better. Fixtures should cast light down across the walking surface, not sideways into planting beds or up into faces. Spacing should support a gentle rhythm of visibility rather than a runway effect. In wet weather, even low output can be effective when it catches path edges, grade changes, and surface texture.
Think about how someone actually moves through the yard:
- from driveway to front door
- from back door to compost, gate, or garage
- from patio to steps or a side path
- across a narrow passage where plants lean in after rain
Those routes need enough light to prevent missteps, especially during Seattle’s long dark season. They do not need every fern, salal patch, or groundcover lit along the way. If a path edge disappears because planting has overgrown it, pruning or bed editing may solve as much as another fixture. For layout context, small backyard design for Seattle homes offers useful guidance on circulation and usable outdoor rooms.
Make Steps Visible Without Blasting the Whole Slope
Steps and grade changes deserve more precision than general path lighting. A single hidden riser can become a real hazard on a rainy evening, especially where moss, leaf litter, or dark paving reduces contrast.
Good step lighting makes the change in level obvious from the direction of travel. That can mean small shielded fixtures, integrated lights near risers, or carefully aimed low fixtures that reveal edges without shining into eyes. The important part is visibility at the foot level, not brightness across the entire slope.
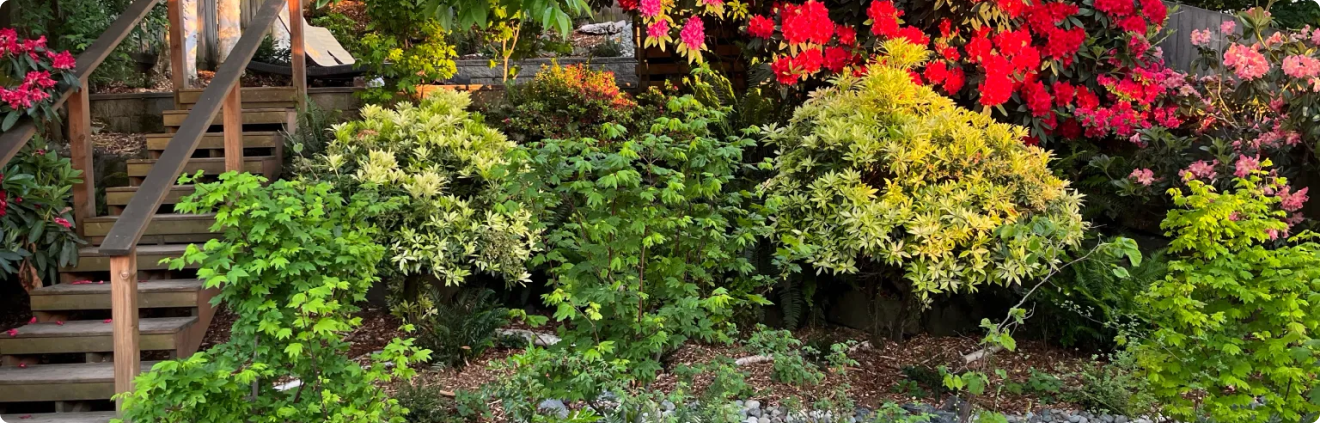
On Seattle lots with terraces, side-yard stairs, or backyard transitions, avoid solving step safety by flooding the whole area. Over-bright slope lighting can wash out planting, disturb adjacent habitat, and create sharp contrast where the light ends. A more restrained plan might light the step line, the handrail area, and one landing, while leaving nearby shrubs and understory darker.
If grade, runoff, and planting are being redesigned together, coordinate lighting before hardscape and planting are finished. The guide to slope planting and erosion control in Seattle can help when steps are part of a larger hillside or retaining-edge project.
Use Warm Color and Lower Output Near Planting Beds
Color temperature changes the feeling of a garden and the way light affects nighttime habitat. Cooler, blue-white light often feels harsh outdoors and can make foliage look flat or artificial. Warmer light is usually easier on the eyes and more compatible with a quiet residential garden.
For planting beds, use the lowest output that supports the task. A soft wash near an entry bed may be enough to show the path edge and a few structural plants. A brighter beam aimed through a whole border may make the garden look dramatic for a few minutes, but it can also overpower leaf texture, create glare, and draw attention away from the house and path.
Planting beds are not all the same. A front bed near the porch may need some evening visibility. A pollinator bed along the back fence may need none. A rain garden near a walkway may need edge clarity but not full-bed illumination. For habitat-focused planting context, see pollinator garden design in Seattle and native plant landscaping in Seattle.
Aim Fixtures Down and Shield the Source
The easiest way to make landscape lighting feel calmer is to hide the light source from normal viewing angles. You should see the surface being lit more than the fixture itself.
Shielding helps with three things at once:
- less glare for people walking through the yard
- less light spill into neighboring windows
- less unnecessary brightness across planting and canopy
Downward-aimed fixtures are especially important near property lines, second-story windows, and seating areas. Uplighting can be beautiful in limited moments, but it should be used with care. Lighting every trunk or canopy from below is rarely wildlife-friendly, and it can make a small yard feel busy. If one mature tree or textured wall is worth accenting, keep the beam controlled and give the rest of the garden darkness.
Fixture placement should also account for plant growth. A path light that works on installation day may be swallowed by ornamental grasses in August or blocked by shrub growth after two seasons. A maintenance path around the fixture matters, especially in beds with dense ecological planting.
Put Timers, Zones, and Motion Controls to Work
Wildlife-friendly lighting is not only about fixtures. It is also about when lights are on.
Most residential gardens do not need full lighting from dusk to dawn. A practical control plan might keep entry and key path lighting on during evening arrival hours, then dim or shut off garden accents later. Motion controls can help with side-yard gates, trash areas, or occasional access routes. Separate zones let you keep front safety lighting active without running backyard accent lights all night.
Useful zones often include:
- front path and entry
- steps and grade changes
- patio or gathering area
- occasional-use side yard
- limited accent lighting
Controls also help across seasons. In November, a front path may need earlier lighting for daily use. In July, the same path may only need brief evening support. A set-it-once schedule rarely matches Seattle’s shifting daylight, weather, and outdoor-use patterns.
Broader garden design for Seattle homes can support that coordination.
Keep Lighting Out of Drainage and Maintenance Trouble
Seattle’s wet months make fixture placement more than a visual decision. Low spots, splash zones, leaf buildup, and soggy bed edges can shorten fixture life or make maintenance frustrating.
Before installing, look for:
- downspout discharge near proposed fixtures
- planting beds that stay saturated through winter
- mulch that migrates onto paths during heavy rain
- irrigation spray or drip lines that conflict with fixtures
- areas where seasonal cleanup will require easy access
In planting beds, fixtures should be reachable without crushing plants. Wiring routes should avoid unnecessary root disturbance around trees and established shrubs. If a bed is being renovated, coordinate lighting sleeves, irrigation, and drainage before the plants go in. Otherwise, the garden can end up being dug up twice.
Good maintenance is modest but real: clean lenses, adjust fixture angles after plant growth, check timers, and clear leaves that block light. This keeps output low and effective instead of forcing homeowners to compensate for dirty or blocked fixtures with brighter settings.
When a Lighting Plan Needs Professional Help
Some lighting improvements are small and focused: a dark step, a side gate, a short path from driveway to porch. Larger yards, sloped sites, layered plantings, and habitat-focused gardens usually benefit from a more deliberate plan.
Professional design is especially useful when:
- the yard has several routes used after dark
- steps, slopes, or wet paving create safety concerns
- planting beds are dense or habitat-focused
- neighbor windows are close to the fixture locations
- lighting must coordinate with irrigation, drainage, or hardscape work
- the goal is a calm garden, not a bright perimeter
The best systems feel almost obvious once installed. People can move easily. Steps are readable. The entry feels warm. The planting still has nighttime quiet. That kind of restraint usually comes from choosing fewer fixtures more carefully, not from adding light everywhere.
FAQ
What makes landscape lighting wildlife-friendly?
It uses only the light needed for people, aims light downward, shields glare, avoids unnecessary all-night brightness, and leaves habitat areas darker whenever possible.
Are path lights bad for wildlife?
Not automatically. Low, shielded, warm path lights can improve safety with limited spill. Problems usually come from excessive brightness, poor aiming, and lighting areas that do not need evening use.
Should I avoid uplighting trees?
Use uplighting sparingly. One controlled accent may be appropriate, but lighting multiple trunks and canopies all night is usually too much for a habitat-focused garden.
What color temperature is best for garden lighting?
Warm light is usually better outdoors than cool blue-white light. It feels calmer, reduces harsh glare, and tends to fit residential planting beds more naturally.
Do I need smart controls?
Not always. What matters is that the system can be scheduled, zoned, and adjusted by season. Simple timers and separate zones can be enough for many homes.
If you want a lighting plan that makes paths and steps safer without overpowering the garden, schedule a consultation with Rutheo Designs. We can help you place fixtures, protect darker habitat areas, and coordinate lighting with the planting and drainage already shaping your yard.